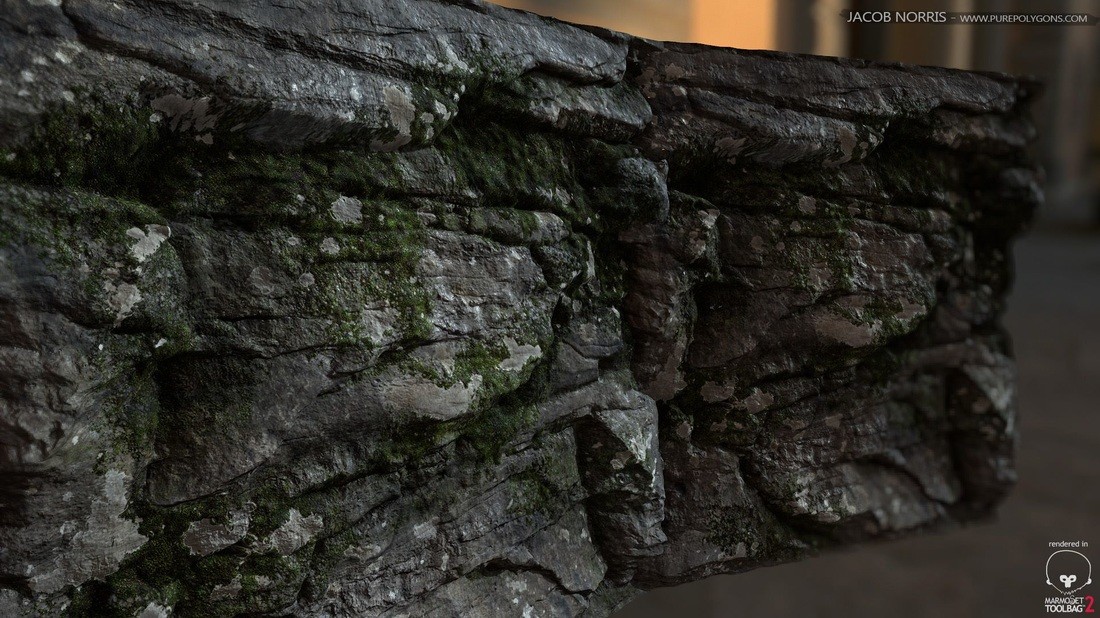
Rock, Cliffside Wall Moss Breakdown using ZBrush
Start off with a flat plane for the rocks and begin sculpting large shapes with the Clay brush. You should be at a decently low poly mesh right now around 20k. This allows you to get the large forms in and the basic details for the rocks with quick iterations of pushing and pulling. While doing this, use the Trim Dynamic brush to polish off areas and get some nice sharp edges for the rocks.
Once you have a pretty good base mesh to work from on the rocks, add more polys and get up into the millions. feel free to use a variety of brushes to get details in, such as:
- MalletFast2 Brush: for chipping a lot of the edges off to chip a lot of edges off
- Trim Dynamic Brush: for polishing.
- Noise Brush: use in spray mode to get some nice rocky crevices and details across the surface
- Slash 3 Brush: to use in combination with the MalletFast brush to sculpt some of the cracks
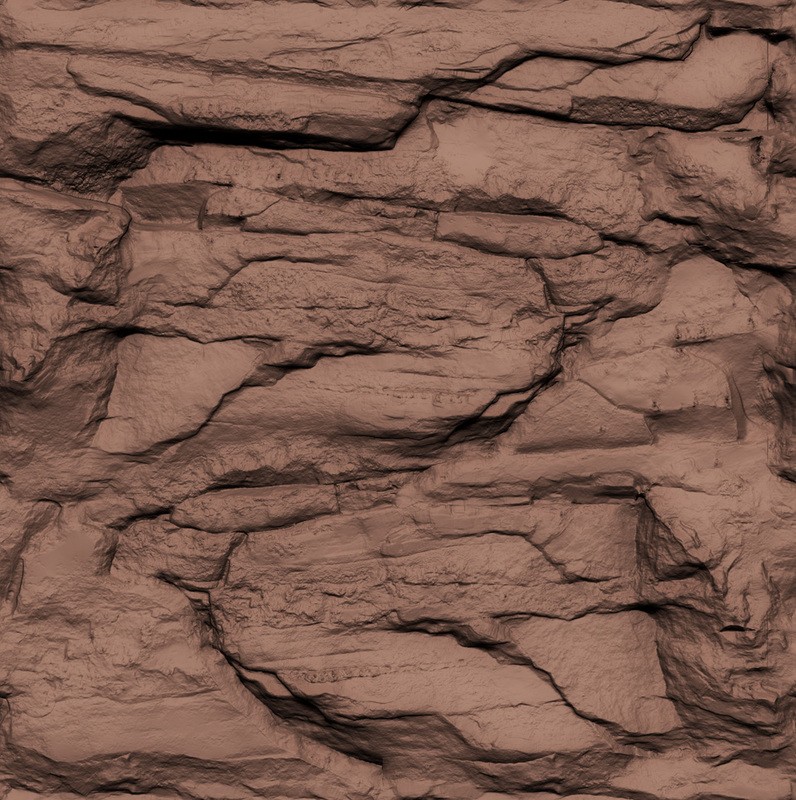
Now you can start adding details such as moss and light patches across the rock.
GrabDoc the rocks and take this into Photoshop to create a mask for where the moss will be placed. In Photoshop, make the moss a black color mask and the white areas a white colored mask. Bring back into ZBrush to do something special with it.
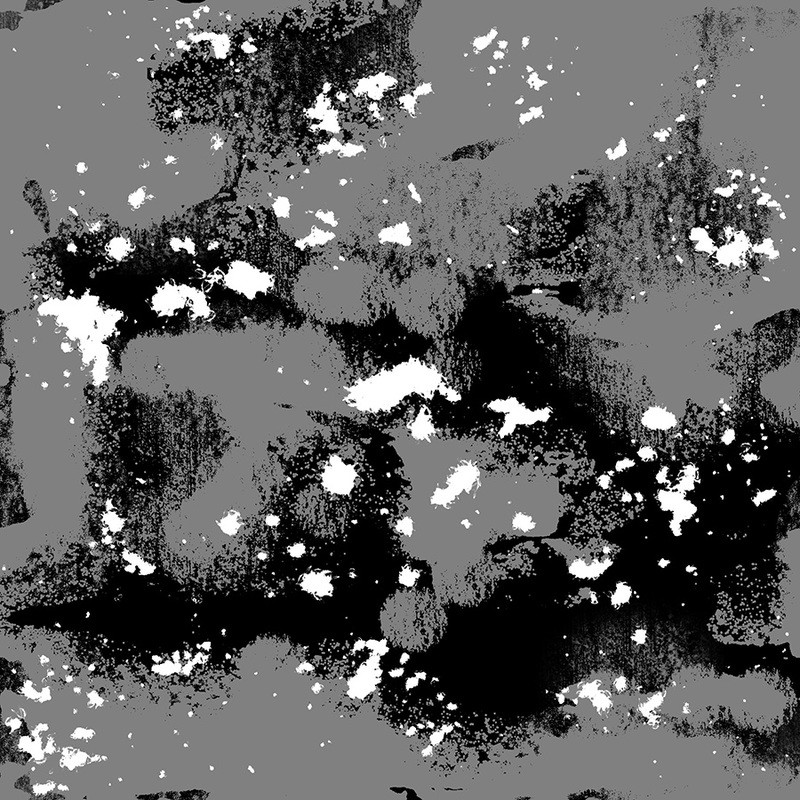
Image of mask created for the moss and patches across the rock. The mask will help you get some nice bevels on the rocks in ZBrush. PS: When importing your mask into ZBrush, flip the image vertically (not rotate, FLIP!) to bring the alpha in upside down and have it show up correctly on the mesh.
Import your alpha/mask back into ZBrush from Photoshop. Mask the ZBrush tool using the alpha. See image below.
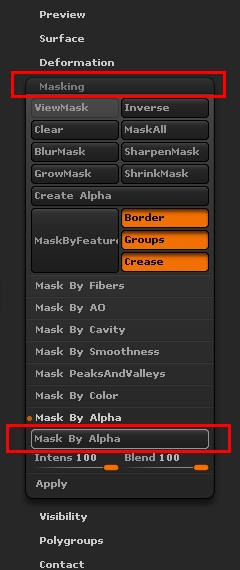
Once the ztool is masked using the alpha that was made in Photoshop, bevel that detail into the mesh.
Whatever is grey in the alpha will not move at all. Whatever is black will be pushed back into the mesh and whatever is white will be pushed out towards the camera just like a height map. With the mask, go to the deformation tab in ZBrush and offset the mesh in the Z-Axes. The Z-Axis is facing the camera so it will push and pull things properly.
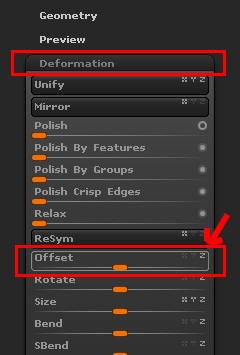
Offset the mesh until you get the desired amount of bevel from the alpha. With the ztool still masked, use the mask to sculpt in the moss detail without affecting the rock areas. You can use the Noise Brush to go over the moss. Nothing really special here.
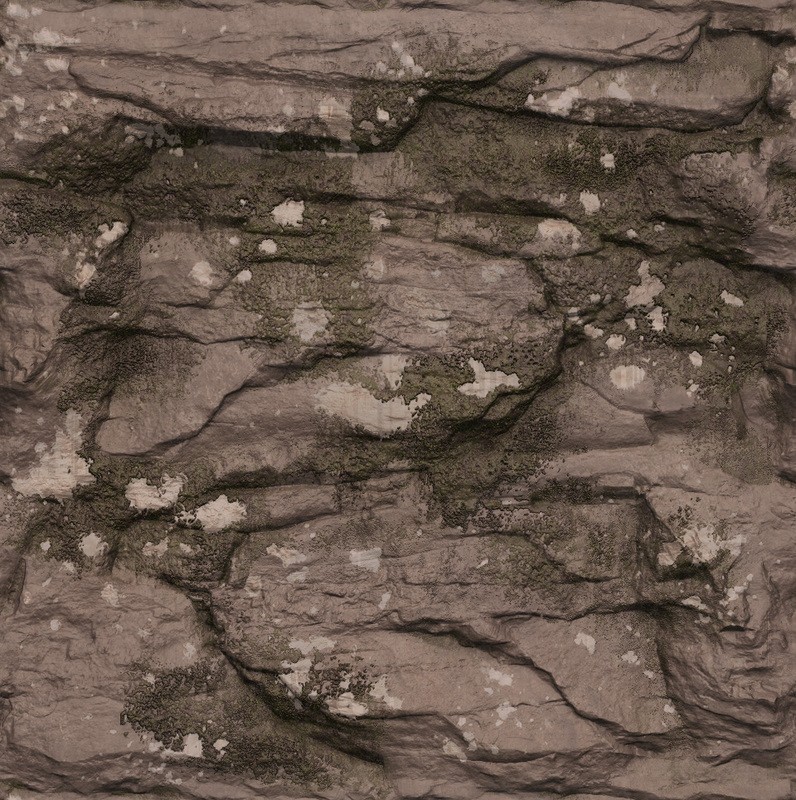
This is the resulting ZBrush sculpt after the deformation mask was applied and the noise was sculpted on top of the moss.
From there, it's just normal Photoshop texturing, and you have a nice mask for photoshop to texture in the moss detail.
Hope this helps!